This document is intended to help users manually update the corrupted IPC firmware.
2 Get Firmware
Please consult Sunmi Technology Customer Service for the latest firmware of your devices and do not use any third-party firmware which may cause malfunctions.
Release firmware for the Face Sense Camera (or FS & FM020): Download here.
Release firmware for the Store Sense Camera (or SS & FM010): Download here.
3 Notes
Firmware is not interchangeable and you should use correct firmware for your device.
Verification will be performed to ensure the firmware is correctly signed before actually updating. Please make sure the firmware comes from Sunmi Technology to prevent malfunctions or bricks after updating.
4 Update Procedure
4.1 Copy the firmware to the SD-card
Remove the SD-card from the IPC.
Plug the SD-card into a Microsoft Windows computer, format the SD-card with EXFAT file system and set the volume label to “SUNMI-XXXX” where “XXXX” is the last four digits of the MAC address which is on the label of the device.
Copy the firmware file to the SD-card’s root directory and rename it to “up.bin”.
4.2 Update
Insert the SD-card with firmware inside into the IPC.
Power on the IPC.
Wait for around 10 seconds until the red LED is on, indicating it is updating.
Wait for around 1 min, if the red LED is off and green LED is on that means the device is going to reboot. The updating procedure completes when the green LED is flashing or the blue LED is on.
4.3 Setup
After rebooting, hold the Reset button for a few seconds to restore the factory settings.
Follow the procedures in the User Manual to setup your device and bind it to your account.
Use the Sunmi Assistant App or go to https://store.sunmi.com and update the firmware to the latest version.
Remember to delete the “up.bin” file under the root directory in the SD-card, preventing any accidently update.
This tutorial will show you how to test the IPC OpenAPI with Postman.
Consult the Sunmi Technology Customer Service and get materials in the table below except the IP and SN of your device. And please connect your IPC to the Internet and make sure the blue LED is solid before going through the following steps.
Download Postman: Link, we use v7.27.1 in this tutorial.
And just follow the Installation Wizard.
3. Collection Import and Configuration
Launch Postman
Click File -> Import -> Upload Files, And open the Postman collection from Sunmi, i.e. “Sunmi_IPC_OpenAPI_Postman_Collection_202007001.json”, confirm and click “Import”.
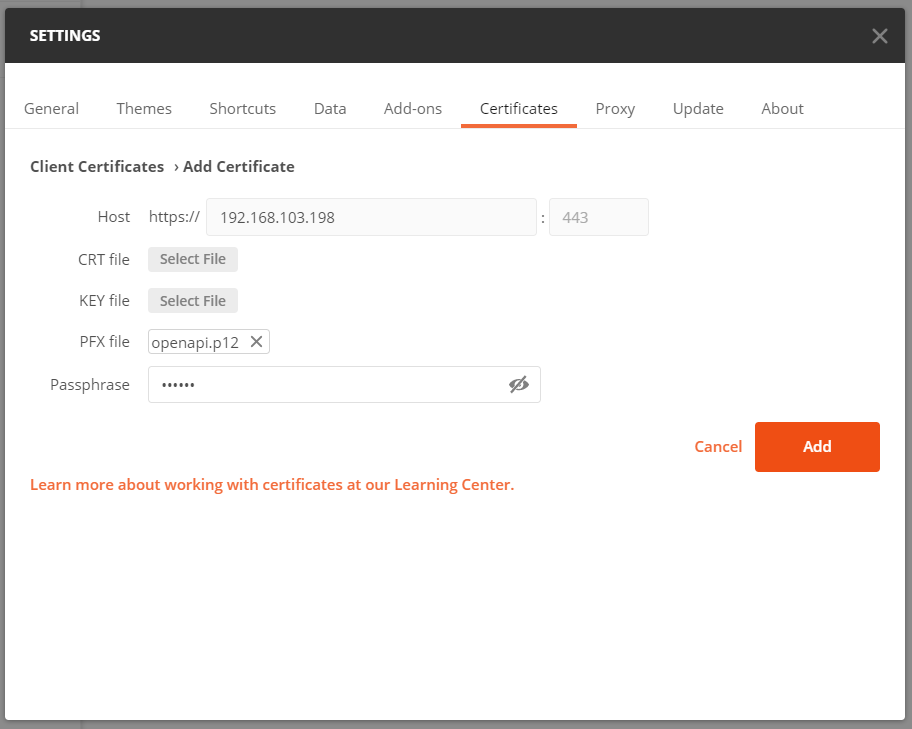
Click File -> Settings -> Certificate, add the certificate file and its password, put the IP in the Host filed.
4. Open the General page, set “SSL certificate verificatio” to `OFF`.
5. Back to homepage of Postman, right click on “Sunmi IPC OpenAPI” collections, “Edit”, and update the corresponding settings at “CURRENT VALUE” in page “Variables”.
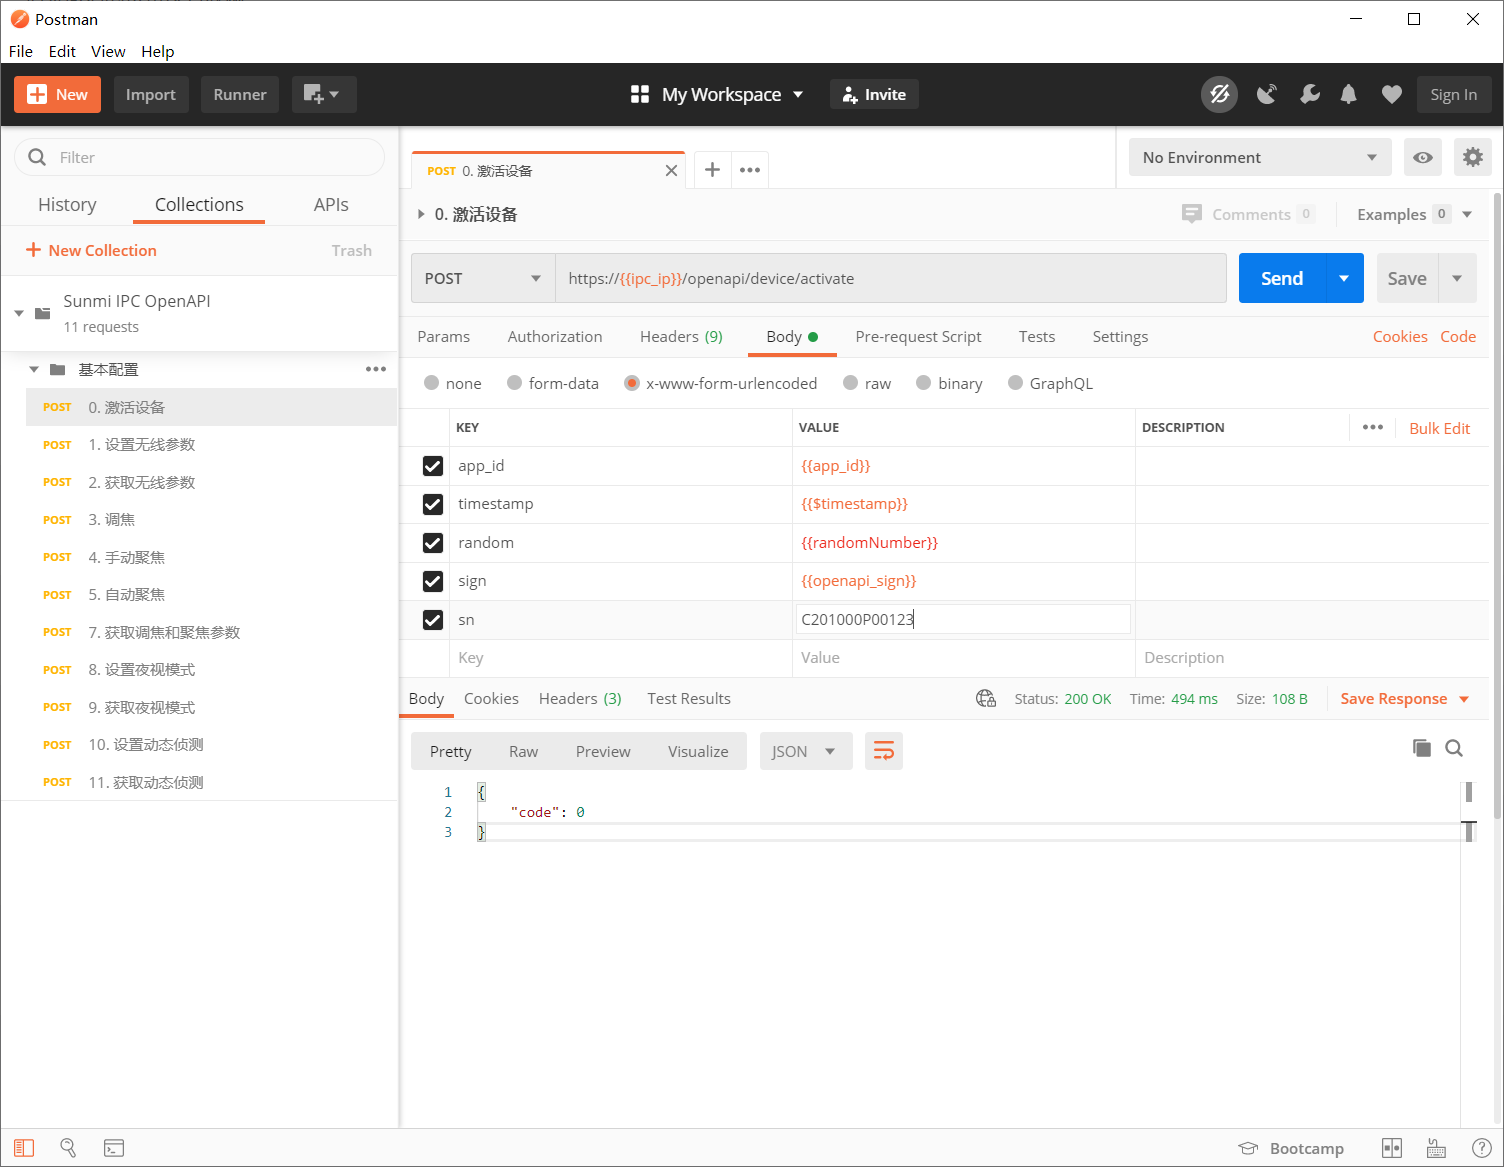
4. Activation Example
Activation use the activation code as the secret key, Make sure the value of secret_key in the Variables page is your activation code.
Open Sunmi IPC OpenAPI -> Basic -> 0. Activation, modify the “sn” to your device’s SN in the Body tab, click Send, activations succeed with “code” 0 in the response.
Please find the detailed docment about activation in Device Management.
5. API Test
This collection only includes several API example for testing. Each request needs to be correctly signed, see the Sign Rules.
Sign script are included in this collection in “Pre-request Scripts”, it will calculate the value of “app_id”, “timestamp”, “random” and “sign” in every request.